Please Respect My Work...

All of the cards, layouts, handmade items and art work displayed on this website are copyright to me, Lynne Mizera. Of course I hope to inspire and encourage you and would be morethan happy for you to use any of my work to that end; however, please respect me and my work and do not directly copy any of my projects without crediting me or enter any of my work into any magazines or competitions without my express written permission. All my cards, layouts, projects and art work are not to be used by any commercial enterprise for any financial, marketing or commercial gain.

Wednesday, November 29, 2017

The 7th Annual STAMPlorations Stencil Hop - Featuring Sanna Lippert Stencils

Hello and Happy Wednesday everyone!  Today I am happy to be participating in STAMPloration's 7th annual Stencil Blog Hop with the release of a brand new set of stencils created by designer Sanna Lippert.

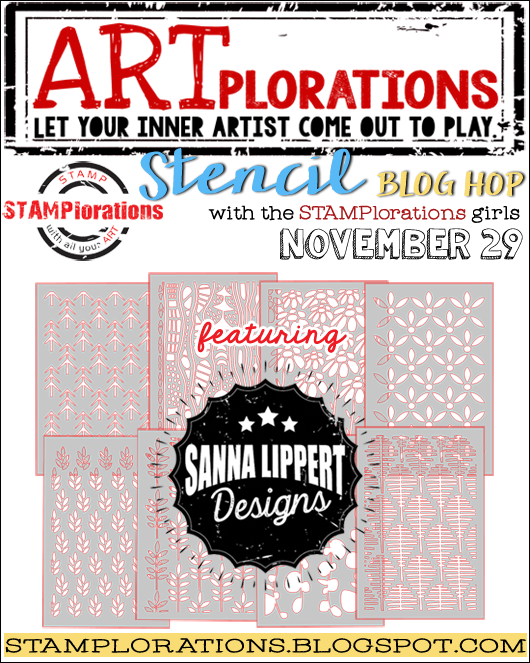
These stencils are the first created by Sanna Lippert, and I am loving her designs.
 
For my first project I decided to create one of my altered tins, 
 
which I wrapped in this lovely sleeve of black tin, which I first embossed using Sanna's new Flower Stencil #1 and sanded to reveal the lovely pattern... (Go HERE to read my blog post about how to emboss metal using stencils.)
I decorated the lid using a few butterflies cut from the same black metal and sanded to reveal their pattern, and embellished with some pearls.
 
For my second project I created this personal art journal page using Sanna's Evolution stencil.
 
This page came together really quickly since I sprayed a sponge with different colored dylusions sprays and sponged the color through the stencil. 
I softened the background by spraying the page with water and blotting off the excess with a paper towel.
I used a black waterproof ink pen to add my journaling and to doodle and outline.  And these are only two of the eight new designs that are being released today, so pop on over to the STAMPlorations blog to see what the other design team members created with the rest of these new stencils.
Oh and this IS a blog hop... so don't forget to leave a comment here and on the STAMPlorations blog for a chance to win either a $20 gift certificate to the shop or 3 of the new Sanna Lippert stencils - your choice.  Commenting closes December 4th.

So that's all for today, thanks for popping in again and please do leave me a comment if you like what  you see!

Lynne Mizera
for the STAMPlorations Design Team
 

STAMPlorations products used today:

Use my personal discount code: STAMPGIRLLYNNE to receive 20% off your entire order, even sale items.
Flower #1

Evolution
Flutter Zen 2 layer die


Tuesday, November 21, 2017

25 Days of Christmas Tags - Day 22, STAMPlorations

Happy Day everone!! Today I am excited and honored to be participating in Tracey McNeely's 25 Days of Christmas Tags event and also to be showcasing some of STAMPlorations new products for the 2017 holiday season.  Here are just a few of the tags I created for Day 22 of this event:   (Note - find all the tags from November 1st forward at In My Creative Opinion
 
My first set of tags were inspired by the new Christmas Flower stamp from STAMPlorations... which I stamped, heat embossed using a black, fine detail embossing powder and then painted using my Kuretake Gansai Tambi watercolor paints.
Cut out and mounted on a shimmery white card stock tag cut from the CUTplorations Nesting Luggage Tag dies, this image is so beautiful that the tag did not need anything else.
A gold metal eyelet and some shimmery gold cord to match the gold embossed greeting is all that was needed to finish off these simple yet elegant tags.
For my second collection of tags I used the new Christmas Tree #1 die from CUTplorations mounted with foam tape onto the largest of the luggage tag nesting dies to create some dimension.

Embellished using every kind of sparkly bling I could find, the bigger and blingy-er the embellishment the better the tag looked.  Now THAT is my kind of Christmas tag!
 
Creating these tags was so fun, and they came together so easily I kept thinking "What a great family project this would make because even the little ones could help with the decorating."
 
And there really is no limit to what you can use to decorate these wonderful Christmas tree images.  And as an added bonus, all the bling for these particular tags was purchased from my local dollar store for very little money (a definite Win, Win)!


So that's my inspirational post for this year's 25 Days of Christmas Tags event, I hope it was both enjoyable and inspiring, and please do leave me a comment if you liked what you are seeing.  And, if you haven't yet, do pop on over to Tracey McNeely's blog today to see all the other wonderful tags my team mates created to inspire you.

Lynne Mizera
for the STAMPlorations Design Team
  

Note: Please use my personal discount code:
STAMPGIRLLYNNE
to receive an additional 20% off your entire order, even sale items.

STAMPlorations products used:
CUTplorations Christmas Tree#1 Die
STAMPlorations Christmas Flower - Large
CUTplorations Luggage Tag Nesting Dies


Sunday, November 19, 2017

It's A New Day... Creating A Mixed Media Canvas Using Stencils

 
What a beautiful Sunday to be sharing this mixed media canvas I created using my stencils for today's Stencil Sunday over at STAMPlorations.  This is a piece I made for myself using modeling paste and paints through a few different stencils. 
I started by collaging some inky paper towels to my canvas (remembering to use a matte medium so the following layers will stick)  and then softening the background with a layer of white gesso.
 
I then created a focal point using the Happy Flowers stencil with some Liquitex light modeling paste, and once this had dried, added more paint layers in different colors through more stencils until I felt like I was done.
 
I used some wax paper as a mask over top of the flowers to protect them from the paint, and I redefined the main image again by using some fine-tipped markers to outline it.  And finally I added gold accents using both gold foil and gold paint.
 
One of the reasons I love mixed media so much are the rich textures and colors that are created on the finished piece as you go through the process, each step creating another layer, but still allowing all those previous layers to peek through.

So that's it for this month's Stencil Sunday inspiration, I do hope you enjoyed my sharing today.  And if you do feel inspired to create using your stencils consider linking up your project to this month's Mixed Media Challenge over at STAMPlorations where it is always Anything Goes except a card and you use a stencil, any stencil.  Go HERE for all the details...

AS always, thank you for popping in today to see what I am up to and please do leave  me a comment if you like what you are seeing!

Lynne Mizera
for the STAMPlorations Mixed Media Design Team

Use my personal discount code; STAMPGIRLLYNNE
to receive 20% off your entire order, even sale items!
 
STAMPlorations Products Used On This Project:

Happy Flowers Stencil
Dots All Over Stencil
Plaid Maker Stencil
New Beginnings Stamp


Monday, November 13, 2017

Creating An "Anything Goes" Art Journal From Scratch... A Tutorial By Lynne Mizera

Hello everyone and Happy November!  Today, for my monthly mixed media tutorial over at STAMPlorations I thought I would share with you a few photos of my very favorite Art journal which I created from an old, cloth-covered book I found at my local second-hand store.  And then show you a very simple technique to create your own striking page using only one stencil, one stamp and some ink, paints and pens.  Here is that page:
 
I was finding that I was not using the expensive mixed media art journals I had on hand because I didn't want to mess up those pretty and perfect pages.  It was really intimidating and creatively stifling so I decided to alter this book so that it was already messed up and freed me up to do anything I liked inside those pages.
 
When making this type of journal look for a cloth-covered book with signatures which are sewn in rather than glued in (signatures are the pages that are grouped together in a book).  These will hold up better when you get them wet with paint and product.  Then take out a few pages from the middle of each signature to make room for expansion when your pages get all lumpy and bumpy. 
 
Then, using an old gift card apply a thin coat of gesso or paint to every page. You do this not to cover up the writing, personally I like some of the writing and photos to peek through, but to seal the pages and to give them more body.
 
I like a matte finish because everything sticks to matte better, but it is personal choice if you want it smooth and glossy or matte and textured.  You can apply the base paint to all of your pages at once, or "paint-as-you-go", but sometimes, when I am having trouble getting inspired, just adding paint to my art journal pages is enough to get me going.
 

This is also the journal I use to clean up any left over paints or mediums when I am working.  These products are just too expensive to waste, so when I am making something mixed media style, I clean up my stencils and any extra  paint into this journal.  Now I have pages already started for my next project - as in this case, where I used the page below for today's Art journal spread...
 
 And here is the process:
1. Stamp an image or images onto your page
 
Look for contrast and places where colors meet when you are stamping those images to get the most effect.
 

2.  Use gesso and/or paint to cover up the background and make those images pop.
 
3. Outline the images in black pen to clean  up the edges and to intensify the lines.  No need to be perfect with this technique... messy and close enough is just fine.
4. Add texture to the background using a stencil with either paint or pastes and mediums.
 
5.  Add a Sentiment - using a stamp or your own writing.
6. (Optional) enhance the lines of your stamped images using Pebeo Cerne Relief.


 And now I will fill the other side of this spread with some personal journaling to myself...
 
So that's my tutorial for this month... I hope it inspires you to go play in your own art journal.  And, if you are finding that those pretty blank pages are stifling your creativity consider making a book like this that will allow you to do whatever you want...

Lynne Mizera,
for the STAMPlorations Mixed Media Design Team
 
Use Code - STAMPGIRLLYNNE - for a 20% Discount on your entire order at STAMPlorations, even sale items.
 
STAMPlorations Products Used On The Journal Page:
Dots All Over
French Marigold-Large
It Takes Courage


ARTplorations Stencils Shown In the Art Journal:
Autumn Falling
 

Circular Two

Floral Flutes

Fearless - Large

Layered Petals