Please Respect My Work...

All of the cards, layouts, handmade items and art work displayed on this website are copyright to me, Lynne Mizera. Of course I hope to inspire and encourage you and would be morethan happy for you to use any of my work to that end; however, please respect me and my work and do not directly copy any of my projects without crediting me or enter any of my work into any magazines or competitions without my express written permission. All my cards, layouts, projects and art work are not to be used by any commercial enterprise for any financial, marketing or commercial gain.

Monday, February 13, 2017

Where Do You Keep Your Heart? - A Mixed Media Art Journal Page

Hello everyone!  Today it is my turn to create a mixed media tutorial for the STAMPlorations' blog and as it's also the day before Valentine's Day, I wanted to make something pertinent to the holiday so I asked myself the question: "Where Do You Keep Your Heart?" and answered it here in my art journal.
For me, my Art Journal is a very personal space and I keep it like a diary.  This is where I use art as a healing tool and my journal is kept as a safe place to go to play with my stuff.  I never worry about making a  mistake or even about making something "pretty"; I just play with my stuff and see what appears.  Sometimes, as in this case, I ask myself a question and I answer it in my Art Journal - and today's question is "Where Do You Keep Your Heart?"  HOME... inside and out! Smile. Now follow along with me in this photo-heavy tutorial as I detail my Art Journaling process for you.  

I started by adding water colour paint as a wash to my journal pages and using the ARTplorations "Where Troubles Melt" mask and white gesso to create my background:

I always use some painter's tape on the back of a mask so it doesn't move around when I am pouncing on the white gesso for which I use a makeup sponge triangle... my very favorite paint applicator for stencils and masks.
To get a crisp, clean edge when I lift my mask I try to keep my daubing motions straight up and down, but I don't stress if my edges are blurry as this is only the background. 
I continue moving my mask around the page, turning it up and down and all around and daubing white gesso over top until my inner artist yells STOP!
Now I have a happy, softly coloured background to use as a starting place to create my journal page.
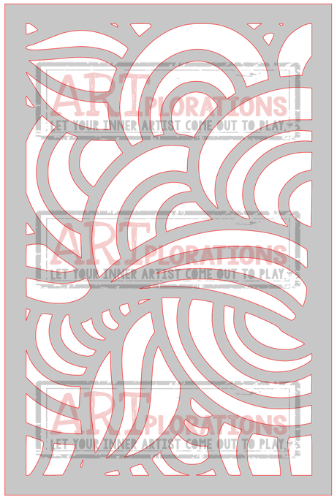
Because I already knew that I was going to create a house and garden in this layout, before I added my elements I created a large sun image using the brand new ARTplorations "Just Flow" stencil  and some Golden Iridescent Gold paint.  I was not too worried about perfection as (again) it was only the background.
Next I began stamping and colouring all the images I wanted to use on this spread.  I only use StazOn inks or Archival inks as they are both waterproof.  (Very important when glueing down your images and adding paint afterwards.)
 
I love stamping on dictionary paper as it adds another layer of  interest without me having to do any work.
 
Now for something different I cut out a simple paper house shape and used the same ARTplorations "Just Flow" stencil and some distress inks to create a background to fill in with some Zentangle patterns.
Once I had all my bits and pieces ready I assemble my page, moving things around until I like the layout and then (this is important...) GLUE THEM DOWN... otherwise you will just keep moving things around your page for days and days and days... Smile.
And once everything is glued down I go back in with  my pens and coloured pencils and add doodles and lines and shading and most importantly the words and journaling!

before details and journaling is added...
After journaling and details are added

Well that's it for this month's tutorial!  I hope you enjoyed my little Art Journal lesson and that it maybe inspired you to go ask the question (and answer it in Art) "Where Do I Keep My Heart?"  And please do share your mixed media creations with us in this month's Mixed Media Challenge where it is Always Anything Goes Except a Card (and you  must use a stencil - any stencil)
  Prizes:
- $10 gift certificate to the winner voted by the Mixed Media team
- $5 gift certificate each to the 2 top picks
- If there are 25 or more entries: 1 random winner of any 2 standard size stencils

Lynne Mizera, Mixed Media Artist
for the STAMPlorations Mixed Media Design Team
  
STAMPlorations products used on the project:
TRENDY BIRDS
The BIRDS And The BLOOMS
Other products Used on this Project:
Inks: StayzOn-black, midnight blue, brown; Archival-black
Paints: Golden Iridescent Gold acrylic paint; Peerless Watercolur Paints
Coloured Pencils: Prismacolor Scholar
Adhesives: ModPodge - Matte
Other: Black Sharpie Fine Point marker

Sunday, February 12, 2017

Creating Some Self-Love For Valentines Day...

Hello Everyone and happy day before the day before Valentines Day!  For STAMPlorations' Stencil Sunday today I am sharing a canvas I created just for ME for Valentines day...

I know that for some of us Valentines Day (which seems to be aimed at happy couples) can be a difficult time; but years ago, when I was the lonely, struggling, single Mom I decided to make Valentines Day about loving myself! From then on every year I make something or do something special for myself to acknowledge how far I have come and how Loved I am by own self.
The entire time I was creating this canvas (using my Magenta Nuance pigment powders - all detailed below) I was thinking about how far I have come this year on my Art Journey and I have chosen 2017 as the year to start making my own art ...

And I filled the two hearts in the ARTplorations - Hidden Hearts stencil with some of my favorite Zentangle patterns - which I just realized is some of my own art.  So if Valentines Day is getting you down go make something to gift yourself!

Now for those of you that are interested here is a brief photo-tutorial to show you how I used pigment powders and a stencil to create my background:
sponge water through a stencil onto 140lbs watercolour paper.  Use a LOT of water. It is easier to see if the water is tinted, but not necessary...
Sprinkle pigment powder onto the wet stencil, you can help move the dye around using a sponge, but be gentle if you want your lines to show.  I have found if I want to keep my white lines crisp I need to blot up the excess pigment with a paper towel.

Once my background was dry I used a black sharpie marker to outline and doodle and added a butterfly and some glass beads for interest...
I mounted the entire piece onto an inexpensive 6"x8" board canvas and wrote in my own hand this wonderful statement that came into my life yesterday and inspired this entire project... "She Flew On Her Own Wings"... 
So don't forget to pop on over to the STAMPlorations blog to see what the rest of the design team created to inspire you this Sunday... 
And Happy Love Day, because Your Are Loved!

Lynne Mizera, Mixed Media Artist
for the STAMPlorations Mixed Media Design Team

Products Used on the Project:
ARTplorations - Hidden Hearts
140lbs Watercolour paper
Magenta Nuance Pigement Powders
Ranger Glossy Accents
Black Copic Marker
Black Sharpie Pen-fine point
Glass micro-beads
Heart Brads


Sunday, February 5, 2017

Using Stencils To Create A Valentines Day Tag That Attracts!

Happy First Sunday in February everyone!  Sundays are now "Stencil Sundays" for me because every Sunday over at the Stamplorations Blog the Mixed Media design team works to inspire you with our stencil creations.  And this being February I of course created something worthy of adding to my Valentines gift for my sweetie:
 
Now here is what is so exciting to me; this tag was created from glossy white scrap cardboard saved from sticker packaging!
And all I did was use my Dreamweaver glossy red embossing paste and two brand new stencils from Stamplorations; Peony One, and Hidden Hearts.  The paste was dry in less than 10 minutes (with a little help from my heat gun)...
and then all I did was add a few heart brads and a bit of red and white polk-a-dotted washi tape for interest and the sentiment was created using some red rub-on lettering that I have had FOREVER!  
Then I just stuck the two pieces together using Sooke Wang double sided tape, and added some fancy ribbon... Taaa DAAA!
Quick, EASY and so beautiful.  What is it about red and white that makes me happy? Oh Right... maybe Being CANADIAN?  Grin
Thanks for popping by today and I hope I helped to inspire you to create something using your stencils.  
And this being the first Sunday of the month it is also the beginning of a new mixed media challenge over at STAMPlorations where it's always "Anything Goes Except A Card" (and you must use a stencil)... There are PRIZES!!  You should check it out...HERE:

Lynne Mizera, Mixed Media Artist
For the STAMPlorations Mixed Media Design Team
 
STAMPlorations Product Used on this Project:
Stencil: Peony One
Stencil: Hidden Hearts
Other Products Used:
Dreamweaver Glossy Red Embossing Paste
Red Rub-On Letters
Heart Brads
Washi Tape - red dots on white